Pada aplikasi android biasanya terdapat dasboard/ home menu. Isi dari dashboard biasanya berupa icon-icon ataupun nama-nama yang berfungsi untuk menghubungkan ke activity yang lainnya. Ditutorial ini kita akan belajar Membuat UI Dashboard Menu Menarik pada Android Studio.
Untuk membuat dashboard / home bisa menggunakan : Relative Layout, Linear Layout, Frame Layout, dan Table Layout.
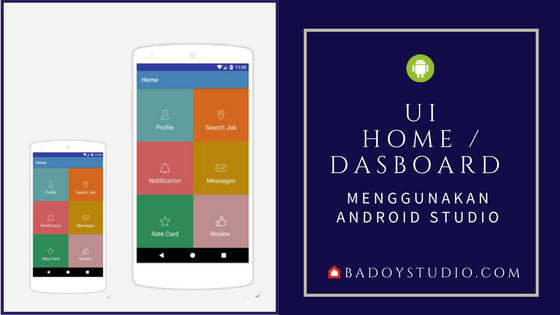
Membuat UI Dashboard Menu Menarik pada Android Studio
Kali ini kita akan membuat dashboard seperti tampilan gambar dibawah dengan menggunakan Relative Layout, Frame Layout ditambah dengan GridLayout. Silahkan ikuti langkah-langkah berikut dengan baik.
1. Buat Project Baru
Oke langsung saja kita buat project baru dengan nama aplikasi dashboard.
2. Tambahkan library
Setelah workspace android studio terbuka pilih build.gradle(Module:app) tambahkan script library gridlayout seperti berikut, lalu klik sync now :
compile 'com.android.support:gridlayout-v7:24.2.1'
Perhatikan gambar berikut ini :

3. Tambahkan icon-icon
Tambahkan icon-icon pada drawable. Icon-icon yang saya gunakan didownload dari freepick.com


Untuk menambahkannya bisa dengan cara klik kanan pada folder drawable > pilih show in explorer > lalu pastekan icon pada folder drawable.
Bisa juga dengan langsung mengcopykan icon dan langsung pastekan pada folder drawable.
4. Edit Activity_main.xml
Jika sudah buka activity_main.xml lalu tambahkan kode-kode dibawah ini :
<?xml version="1.0" encoding="utf-8"?>
<android.support.v7.widget.GridLayout
    xmlns:android="http://schemas.android.com/apk/res/android"
    xmlns:app="http://schemas.android.com/apk/res-auto"
    android:layout_width="match_parent"
    android:layout_height="match_parent"
    app:columnCount="2"
    app:rowCount="2"
    app:orientation="horizontal"
    >

    <FrameLayout
        app:layout_columnWeight="1"
        app:layout_rowWeight="1"
        android:background="#5F9EA0"
        >
        <RelativeLayout
            android:layout_width="match_parent"
            android:layout_height="match_parent">

            <ImageView
                android:layout_width="wrap_content"
                android:layout_height="wrap_content"
                android:layout_centerInParent="true"
                android:id="@+id/user"
                android:src="@drawable/user"/>
            <TextView
                android:layout_width="wrap_content"
                android:layout_marginTop="10dp"
                android:textSize="20sp"
                android:textColor="#FFFFFF"
                android:layout_height="wrap_content"
                android:layout_below="@+id/user"
                android:layout_centerHorizontal="true"
                android:text="Profile"/>
        </RelativeLayout>
    </FrameLayout>

    <FrameLayout
        app:layout_columnWeight="1"
        app:layout_rowWeight="1"
        android:background="#D2691E">

        <RelativeLayout
            android:layout_width="match_parent"
            android:layout_height="match_parent">

            <ImageView
                android:layout_width="wrap_content"
                android:layout_height="wrap_content"
                android:layout_centerInParent="true"
                android:id="@+id/job"
                android:src="@drawable/pin"/>
            <TextView
                android:layout_width="wrap_content"
                android:layout_marginTop="10dp"
                android:textSize="20sp"
                android:textColor="#FFFFFF"
                android:layout_height="wrap_content"
                android:layout_below="@+id/job"
                android:layout_centerHorizontal="true"
                android:text="Search Job"/>
        </RelativeLayout>
    </FrameLayout>

    <FrameLayout
        app:layout_columnWeight="1"
        app:layout_rowWeight="1"
        android:background="#CD5C5C">

        <RelativeLayout
            android:layout_width="match_parent"
            android:layout_height="match_parent">

            <ImageView
                android:layout_width="wrap_content"
                android:layout_height="wrap_content"
                android:layout_centerInParent="true"
                android:id="@+id/notif"
                android:src="@drawable/bell"/>
            <TextView
                android:layout_width="wrap_content"
                android:layout_marginTop="10dp"
                android:textSize="20sp"
                android:textColor="#FFFFFF"
                android:layout_height="wrap_content"
                android:layout_below="@+id/notif"
                android:layout_centerHorizontal="true"
                android:text="Notification"/>
        </RelativeLayout>
    </FrameLayout>

    <FrameLayout
        app:layout_columnWeight="1"
        app:layout_rowWeight="1"
        android:background="#B8860B"
        >

        <RelativeLayout
            android:layout_width="match_parent"
            android:layout_height="match_parent">

            <ImageView
                android:layout_width="wrap_content"
                android:layout_height="wrap_content"
                android:layout_centerInParent="true"
                android:id="@+id/mail"
                android:src="@drawable/mail"/>
            <TextView
                android:layout_width="wrap_content"
                android:layout_marginTop="10dp"
                android:textColor="#FFFFFF"
                android:textSize="20sp"
                android:layout_height="wrap_content"
                android:layout_below="@+id/mail"
                android:layout_centerHorizontal="true"
                android:text="Messages"/>
        </RelativeLayout>
    </FrameLayout>

    <FrameLayout
        app:layout_columnWeight="1"
        app:layout_rowWeight="1"
        android:background="#2E8B57"
        >

        <RelativeLayout
            android:layout_width="match_parent"
            android:layout_height="match_parent">

            <ImageView
                android:layout_width="wrap_content"
                android:layout_height="wrap_content"
                android:layout_centerInParent="true"
                android:id="@+id/rate"
                android:src="@drawable/star"/>
            <TextView
                android:layout_width="wrap_content"
                android:layout_marginTop="10dp"
                android:textColor="#FFFFFF"
                android:textSize="20sp"
                android:layout_height="wrap_content"
                android:layout_below="@+id/rate"
                android:layout_centerHorizontal="true"
                android:text="Rate Card"/>
        </RelativeLayout>
    </FrameLayout>

    <FrameLayout
        app:layout_columnWeight="1"
        app:layout_rowWeight="1"
        android:background="#BC8F8F">

        <RelativeLayout
            android:layout_width="match_parent"
            android:layout_height="match_parent">

            <ImageView
                android:layout_width="wrap_content"
                android:layout_height="wrap_content"
                android:layout_centerInParent="true"
                android:id="@+id/rev"
                android:src="@drawable/like"/>
            <TextView
                android:layout_width="wrap_content"
                android:layout_marginTop="10dp"
                android:textSize="20sp"
                android:layout_height="wrap_content"
                android:layout_below="@+id/rev"
                android:layout_centerHorizontal="true"
                android:textColor="#FFFFFF"
                android:text="Review "/>
        </RelativeLayout>
    </FrameLayout>
</android.support.v7.widget.GridLayout>
5. Edit String
string.xml ubah app name menjadi home :
<resources>
    <string name="app_name">Home</string>
</resources>
6. Edit Color
color.xml ubah warna utama (primary) :
<?xml version="1.0" encoding="utf-8"?>
<resources>
    <color name="colorPrimary">#4682B4</color>
    <color name="colorPrimaryDark">#303F9F</color>
    <color name="colorAccent">#FF4081</color>
</resources>
Jika sudah diubah semua activity diatas, jalankan aplikasi dan akan tampil seperti dibawah ini.
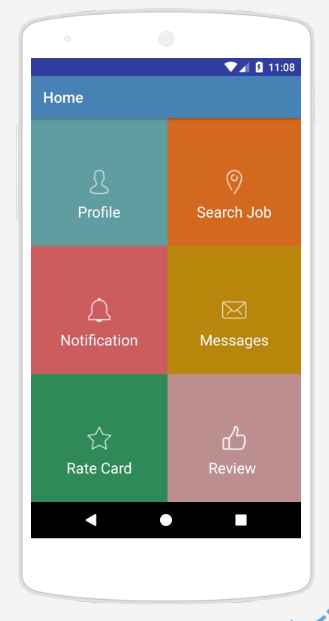
Cukup mudah bukan untuk membuat tampilan dashboard ? silahkan dicoba dan dimodifikasi sesuai kebutuhan aplikasi teman-teman.
Jangan lupa tekan tombol sharenya ya : D Semoga bermanfaat.
sumber http://badoystudio.com/membuat-ui-dashboard-menu-menarik-pada-android-studio/
sumber http://badoystudio.com/membuat-ui-dashboard-menu-menarik-pada-android-studio/

